

As a quilt block designer, one of the most common questions I receive is, "Can I make this block a different size?"
I understand the need to resize quilt blocks to suit specific sewing projects. While I strive to include multiple sizes in my patterns whenever possible, providing templates for every conceivable size isn't feasible due to the infinite variations. However, resizing a quilt block at home is entirely achievable. In this blog post I will explain how you can easily adjust templates provided in a paper pieced or applique pattern to achieve the size you need for your next sewing project:
What You Need to Know Before You Start:
- Resizing differs depending on whether you're making the block smaller or larger.
- Adjusting the size affects seam allowances, which can be easily corrected by redrawing them with a pencil and ruler.
- Going too small may result in loss of detail, especially in pictorial quilt blocks. You might need to combine smaller fabric pieces to maintain accuracy.
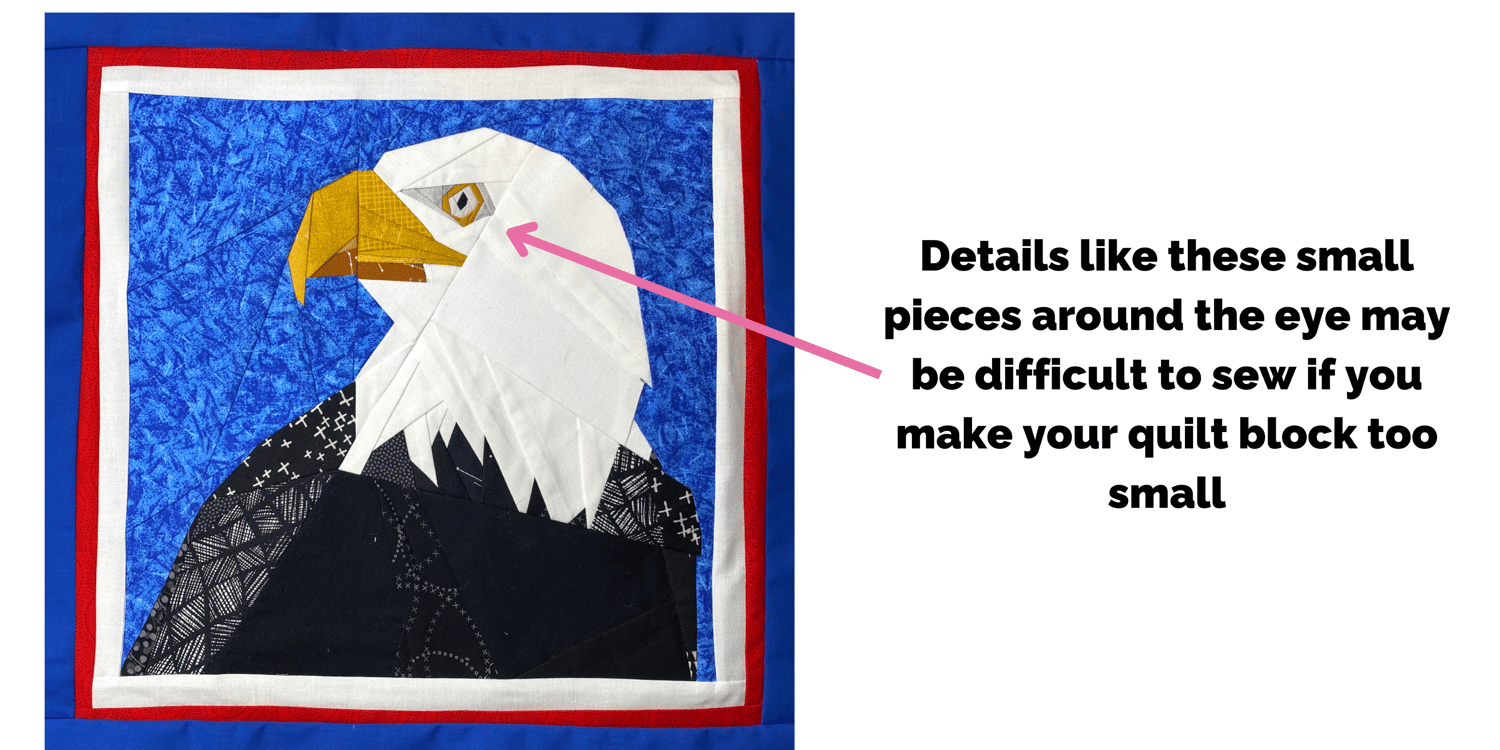
An extra note on going smaller: You may need to make a judgment call based on the design of the pattern, your ability in paper piecing, and if you are happy to adjust the pattern to make it possible to sew. For example, if you planned to make my Bald Eagle Quilt Block smaller, would you be willing to combine some of the smaller fabric pieces around the eye area into one piece so it was easier to sew, or are you going to attempt to sew them even though they might be ridiculously small?
How To Make Your Quilt Block Smaller:
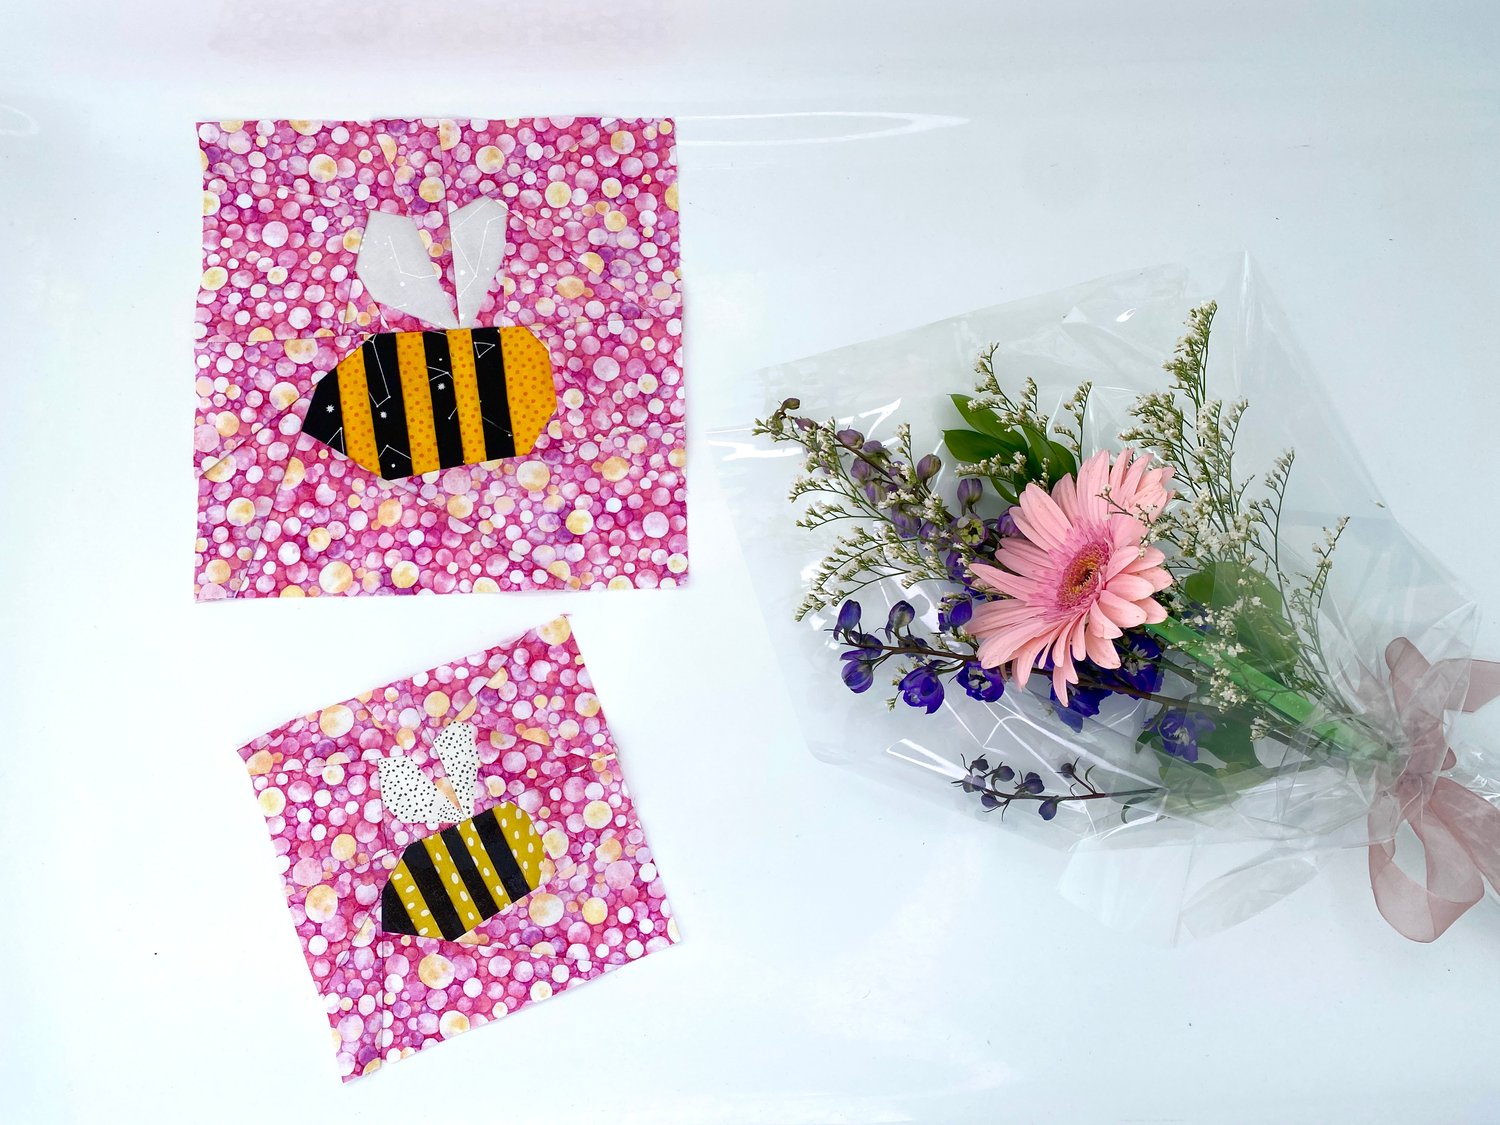
I'm currently making a table runner with my new Beehive Pattern and my Free-Bee quilt block pattern. I decided I was going to make my Bee quilt block in a different (smaller) size to add some depth and interest to my table runner, and to do this I needed to resize my block templates.
The first thing to do is work out what size you need for your project. In this example, I'm going to make a 6-inch quilt block. The templates provided in the pattern are for a 9-inch block.
Next, I need to calculate what percentage smaller my desired quilt block is from the original pattern. It's actually a very easy formula to calculate:
- Divide the desired quilt block size (6) by the original size (9).
- Multiply the result (0.666) by 100.
In this case, a 4-inch block is 66.666% smaller than the original, rounded up to 67%.
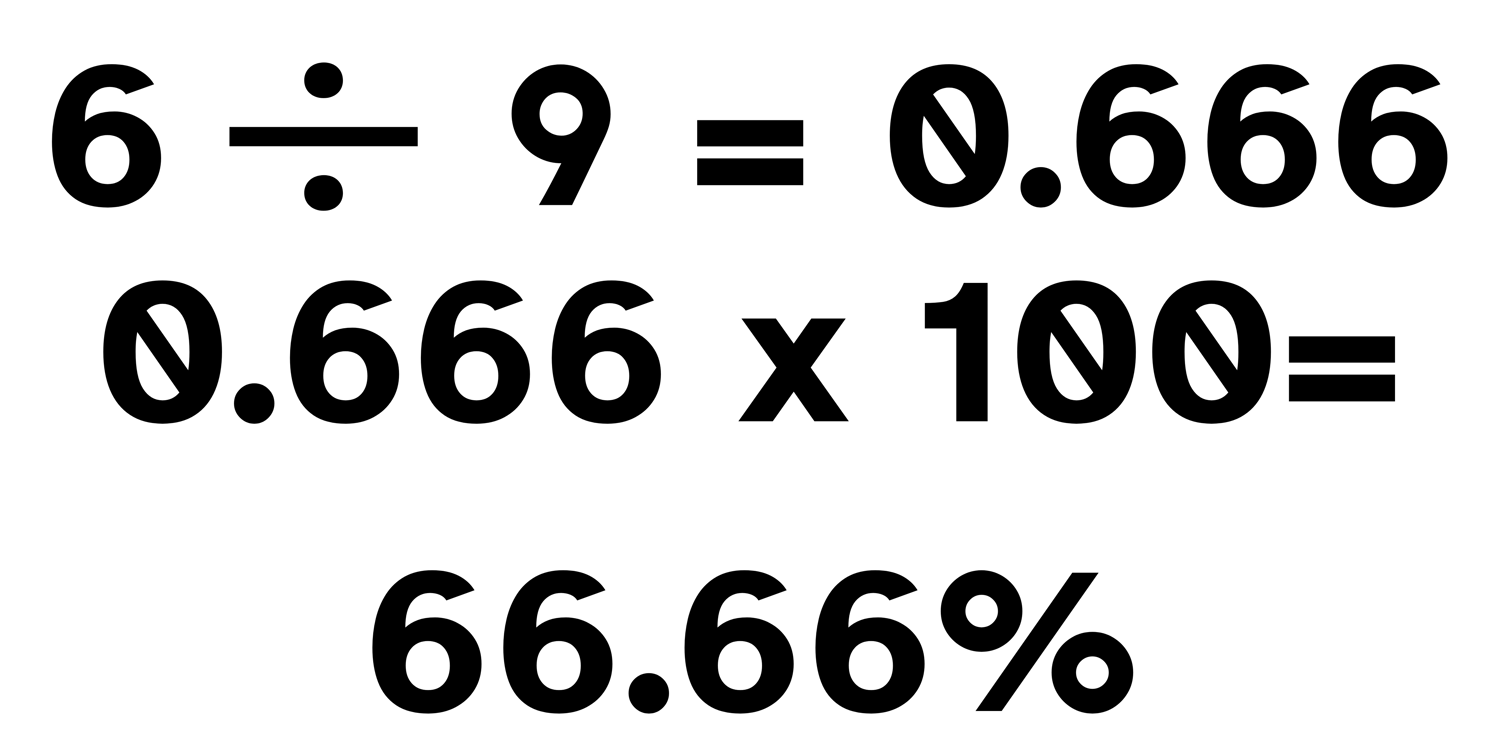
Based on this formula I now know that a 6-inch quilt block is 66.666% smaller. I like to round up, so lets call it 67%
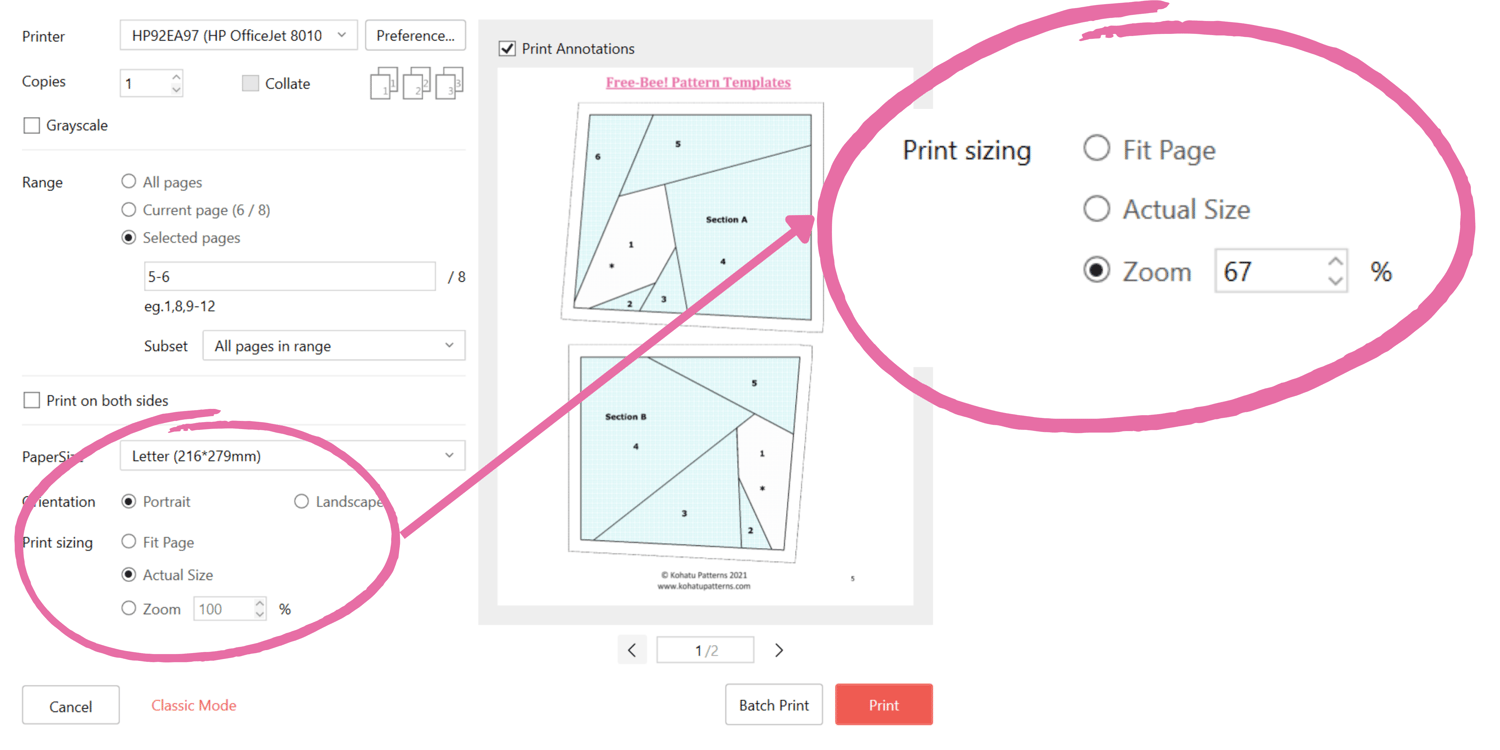
Next I need to open up my pattern file on my computer and select the pages I desire to print Normally I would encourage you to use the setting "Actual Size" when printing, however in this case we are going to change it and Click "Zoom" (note: some printers will call this "Scale") and change it to 67%:
Now I'm ready to print my templates. I know I will have to trim the quilt block minimally after I'm finished to make sure it is 6 1/2 inches (6 inches plus seam allowance).
To Make A Quilt Block Larger:
If I decided to make a10-inch quilt block from my Bee pattern, I would once again need to calculate the percentage bigger I need. The formula stays the same:
- Divide the desired quilt block size (10) by the original size (9).
- Multiply the result (1.111) by 100.
In this case, for a 10-inch block, I need to set my scale to 111%.
Before you print the pattern take a look at how much space is around the edge of each template on your print screen. If there is plenty of space as there is around the templates for the Free-Bee Pattern, then it will likely be ok to print to scale as you would have done to make the block smaller.
If however the templates are large and almost touch the edge of the page before you make them larger you might find that the edges could get cut off if you simply print them at a larger scale. For example, if I were trying to enlarge my Goat Pattern by 20% I couldn’t simply increase the scale and print as part of the templates would be cut off as shown below:
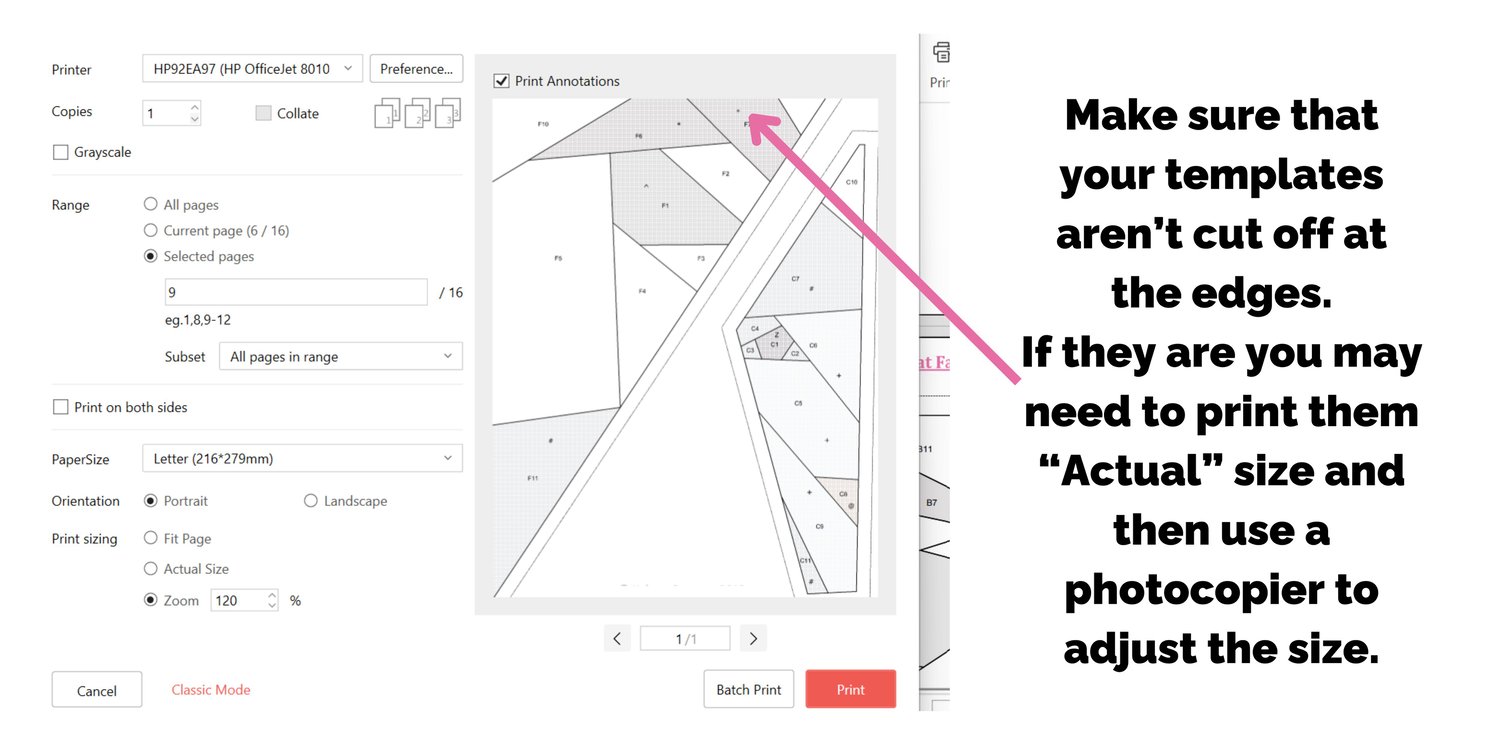
The solution involves using a bit more paper. Because you are making the templates larger, you will need to print them "actual" size first as would if you were going to make the block in the size supplied. This step is crucial because when enlarging templates that don’t have much space around them you will need to use a photocopier.
After printing the templates at "actual" size, the next step is to adjust the settings on your photocopier. Set the size to 111% or the percentage you calculated earlier. When using the photocopier, you may find it helpful to copy the pages twice from different angles. This ensures that each template is captured entirely. After enlarging the templates, glue or tape them together as needed to prepare for cutting and sewing. After sewing the block together you may need to trim the block to ensure it measures 10 1/2 inches (10 inches plus seam allowance).
By following these steps, you can successfully resize the quilt block templates from 9 inches to 10 inches while ensuring the entire template is captured without any edges cut off during the printing process.
As you can see, it's not so hard to resize a foundation paper pieced quilt block at home to suit your quilting needs. Next time you have a quilt block you like, but it comes in a size or sizes, that don't quite fit your sewing project, consider using the simple formula in this blog post and adjusting the printing settings as outlined. I recently applied these steps to create a bumble bee quilt block in a different size for my table runner pattern, and the results were exactly what I needed. By following these methods, you can confidently resize quilt block templates, whether making them smaller or larger, while ensuring the entire template is captured without any edges cut off during the printing process.

Comments ()