

Of all the things you need to know when constructing a quilt, a consistent seam allowance is one of the key things to master. Your seam allowance is what holds your quilt together, and I'm not being dramatic when I say that your seam allowance can make or break your finished quilt. Making it too skinny can mean that your quilt could eventually come apart. Having uneven seam allowances here and there can quickly add up to a disastrous result such as points failing to match up, warping or puckers in the final quilt top.
With all that in mind, here are a few pointers to help make sure you get it right and make your next quilt project a success:
Press your fabrics:

To achieve a consistent 1/4" seam allowance, I suggest that you start by pressing your fabrics well before sewing them together. Pressing fabric well is another of the important factors that will affect your finished quilt top. If you are unsure how to press your fabrics for quilting, check out this blog post for more information.
Check your needle, stitch and presser foot:
The next thing you should do is check the needle position on your sewing machine is centred and your machine is set to a straight stitch. Also check the presser foot on your sewing machine. You may find that you have a 1/4" presser foot, which will make things much easier, especially if you have centred your needle position correctly. With a 1/4" presser foot you can use the edge of the presser foot as a guide
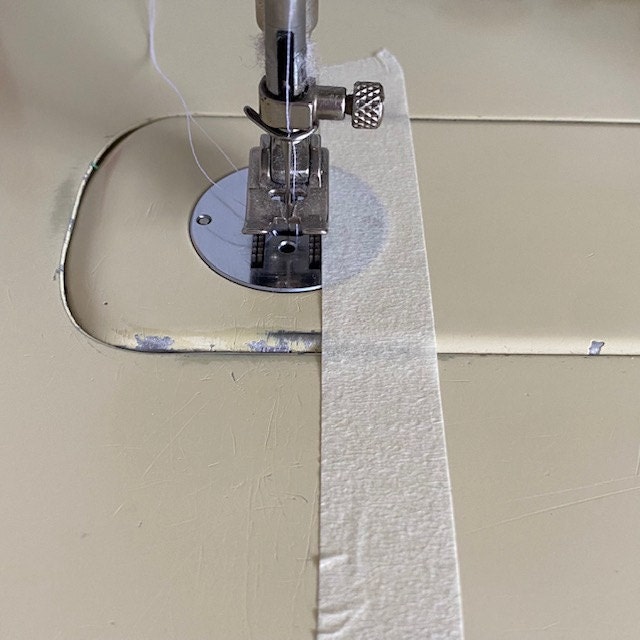
If you are a beginner quilter, I want you to do one more thing for me. Get some masking tape or Washi tape and measure 1/4" from your needle position and place some tape across your base plate to help guide you!
Sew a test:
Cut a straight edge on a piece of scrap fabric (it doesn't need to be a big piece of fabric, even a two inch square will do) Then carefully sew using your guide down the straight edge. After you have finished, use your quilting ruler to check the seam allowance is one quarter of an inch. If is it then you are ready to start sewing your quilt together. If its not quite there, go back and check your needle position, stitch settings and tape line and sew another test on a piece of scrap until you get it right.
Use Pins:
Make sure that you pin your fabrics together before sewing. This will ensure that both your top fabric and your bottom fabric maintain that quarter inch seam. There's nothing worse than finishing a seam and finding that your top fabric has a perfect 1/4" seam allowance, and your bottom fabric has shifted!
So then what is a "Scant" 1/4 inch seam?
As a beginner quilter, you might be wondering why most quilt patterns call for a "scant 1/4" seam allowance. If a pattern calls for a "scant" 1/4" seam, then essentially the designer is saying to sew your seam exactly at or just barely under quarter of an inch. Essentially the quilt designer is reminding you that for a tidy finish to your quilt, you need to ensure your seam allowance is accurate. Regardless of the terminology, keeping a consistent 1/4" seam allowance, pressing your fabrics well, and using pins are key to getting the best result for your finished quilt top. The only exception, is where a pattern calls for a different size of seam allowance. If a quilt pattern calls for a half inch seam instead – do it. There is probably a reason the designer has chosen to vary the seam allowance for their pattern or for a particular section. Otherwise keep it consistent at 1/4' and have fun seeing your beautiful quilt top come together!

Comments ()